Banana Pudding Cups
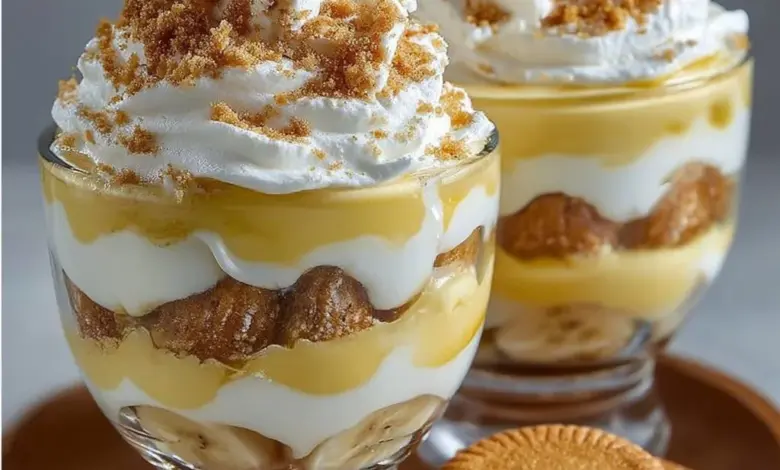
Creamy, comforting, and endlessly satisfying, these Banana Pudding Cups are a little jar of sunshine—perfect for weeknights, potlucks, or anytime you want dessert without the fuss. This recipe layers a dreamy cream cheese mixture with silky vanilla pudding, fresh banana slices, and a crunchy cookie topping for contrast. Fun fact: Southern-style banana pudding has roots in early 20th-century America when canned pudding and wafer cookies made layered desserts both trendy and accessible.
This version stands out because it’s quick to assemble, uses pantry-friendly ingredients, and delivers that nostalgic banana-pudding flavor with minimal effort. If you’ve enjoyed our classic banana cream pie on the blog, you’ll love how these cups are quicker, handheld, and portable—great for sharing. Grab a spoon and get ready: these cups are easy, crowd-pleasing, and downright addictive.
What is Banana Pudding Cups?
What’s in a name? Banana Pudding Cups are literally mini layered desserts served in individual cups—no slicing, no fuss, just pure pleasure in single servings. Why call them “cups”? Because they’re portable, cute, and nobody has to fight over the big dish. Who knew a humble combination of bananas, pudding, and cookies would become a party favorite? And let’s be honest, if you believe the old adage that “the way to a man’s heart is through his stomach,” these little cups are a direct route. Try them for your next get-together and watch people swoon—then come back and tell me which friend ate the most.
Why You’ll Love This
- Creamy, luscious texture: The rich cream cheese base folded with whipped topping and pudding creates a silky, indulgent mouthfeel that feels fancy but is super easy to make.
- Budget-friendly and simple: Most ingredients are pantry staples—cream cheese, sweetened condensed milk, instant pudding mix, bananas, and cookies—so you save money compared to buying pre-made desserts or dining out.
- Flavorful toppings and contrast: Fresh banana slices add natural sweetness and a soft bite, while Nilla Wafers or graham cracker crumbs bring a satisfying crunch that completes every spoonful.
Compared to our richer, time-consuming banana cream pie, these cups are faster and more portable, while keeping that same nostalgic flavor. Make them for dessert tonight—you’ll be glad you did.
How to Make
Quick Overview
This recipe is a no-bake, layered dessert that comes together in about 20 minutes of active prep and needs at least 2 hours chilling time. It’s simple: whip a silky cream cheese-sweetened condensed milk mixture, fold in whipped topping, prepare quick vanilla pudding, and layer everything with sliced bananas and cookie crumbs. The standout element is the contrast between the ultra-creamy filling and the crunchy topping.
Prep time: 20 minutes
Chill time: 2 hours
Total time: About 2 hours 20 minutes
Ingredients
- 1 (8 oz) package cream cheese, softened to room temperature
- 1 (14 oz) can sweetened condensed milk
- 1 (12 oz) container whipped topping (like Cool Whip), thawed
- 2 bananas, peeled and sliced thinly
- 1 box vanilla pudding mix (instant)
- 1 1/2 cups milk (for pudding, or as directed on pudding package)
- Nilla Wafers or Graham Cracker Crumbs, for topping (about 1 to 1 1/2 cups, crushed as needed)
Directions
- In a mixing bowl, beat the softened cream cheese with a hand mixer or stand mixer until completely smooth and lump-free, about 2 to 3 minutes. Scrape down the sides once so everything is evenly mixed.
- Gradually add the sweetened condensed milk to the cream cheese while mixing at low speed. Continue mixing until the mixture is well combined and silky, about 1 to 2 minutes.
- Gently fold in the thawed whipped topping using a rubber spatula until the mixture is smooth and uniform—don’t overmix or you’ll lose volume.
- Prepare the vanilla pudding according to the package instructions using 1 1/2 cups of milk. Whisk until smooth and let it set for a couple minutes until slightly thickened.
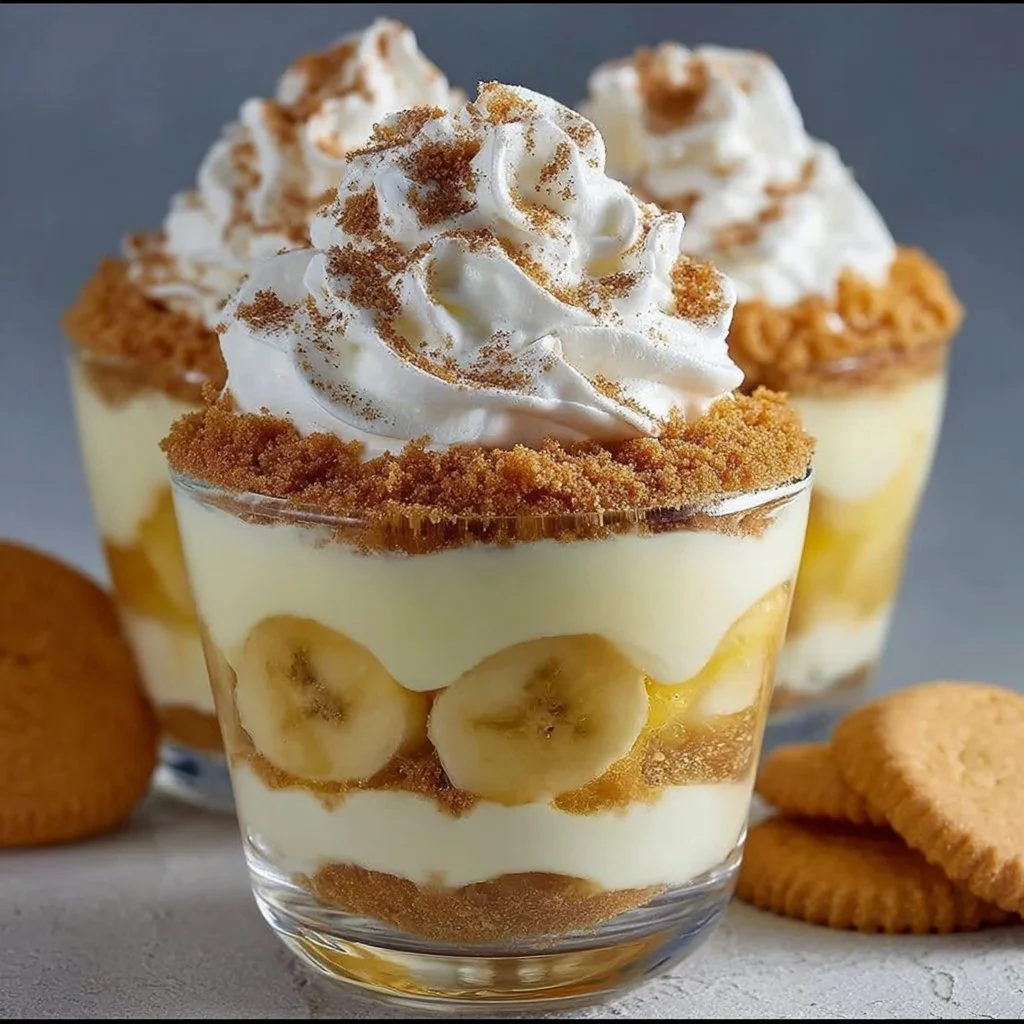
- In your serving cups (small glass jars or dessert cups), start with a layer of 1/3 of the cream cheese mixture, smoothing it down gently with the back of a spoon.
- Add a layer of sliced bananas, arranging them so each cup gets even coverage; then spoon a layer of vanilla pudding over the bananas.
- Repeat the layers (cream mixture, bananas, pudding) until the cups are filled, finishing with a generous layer of pudding on top.
- Crush Nilla Wafers or graham crackers and sprinkle on top for a crunchy finish. Cover the cups and chill in the refrigerator for at least 2 hours to let the flavors meld and the pudding set. Serve chilled.
What to Serve With
- Fresh fruit salad: A light berry or citrus fruit salad brightens the richness of the pudding.
- Iced coffee or cold brew: The mild bitterness of coffee cuts through the sweetness for a balanced dessert pairing.
- Vanilla or cinnamon cookies: Extra cookies for dunking are always welcome.
- Simple green salad: If serving after a heavy meal, a crisp green salad with a lemon vinaigrette refreshes the palate.
- Sparkling water with lime: Keeps things light and celebratory without extra sugar.
Top Tips for Perfecting
- Use ripe but firm bananas: Overripe bananas will turn brown and become too mushy; slightly firm bananas hold their shape better in layered cups.
- Chill ingredients first: Cold whipped topping and chilled pudding set up better and keep the texture light.
- Prevent browning: Toss banana slices in a little lemon juice if you want them to stay bright for longer.
- Make ahead: Assemble the cups a day in advance and add cookie topping right before serving to retain crunch.
- Substitutions: For a lighter version, use low-fat cream cheese and reduced-fat whipped topping. For dairy-free, try coconut whipped topping and vegan cream cheese, and use a dairy-free pudding mix.
- Don’t over-layer: Leave a little space at the top of the cup for the topping and to prevent overflow when chilling.
Storing and Reheating Tips
- Refrigeration: Store assembled Banana Pudding Cups in an airtight container or covered individually in the refrigerator for up to 3 days. Add cookie topping just before serving for best texture.
- Freezing: These cups do not freeze well because bananas and whipped topping change texture when frozen and thawed; avoid freezing assembled cups.
- Shelf life: Best eaten within 48 to 72 hours for optimal banana color and pudding texture.
- Reheating: Serve chilled—no reheating needed. If you prefer slightly less cold, let the cups sit at room temperature for 10 to 15 minutes before serving.
FAQs
Can I use homemade pudding instead of instant pudding?
Yes. Homemade pudding works well; just be sure it’s fully cooled before layering. Instant pudding sets faster and is more convenient, but homemade adds a richer flavor.
How can I stop the bananas from turning brown?
Toss banana slices lightly with lemon juice (about 1 teaspoon per banana) to slow oxidation. Assemble and chill quickly for best results.
Can I make these in advance for a party?
Absolutely. Assemble them a day ahead and store covered in the refrigerator. Add cookie crumbs right before serving to keep them crisp.
Are there gluten-free options?
Yes. Use gluten-free vanilla wafers or crush gluten-free graham crackers for the topping. Also check pudding mix ingredients for gluten-free labeling.
Can I add extra flavors like caramel or chocolate?
Definitely. Drizzle caramel or chocolate sauce between layers or on top for an indulgent twist. A sprinkle of toasted coconut also pairs nicely.
Conclusion
These Banana Pudding Cups are proof that fuss-free desserts can still feel special—creamy, nostalgic, and perfectly balanced with a crunchy topping. They’re easy enough for weeknights, charming enough for potlucks, and friendly for cooks of any skill level. If you want a trusted recipe to compare or try alongside this version, check out this detailed guide for an alternative take on the classic: Homemade Banana Pudding Cups – Barley & Sage. Give these cups a try, share them with friends, and enjoy every spoonful.