No-Oven Stovetop Bread
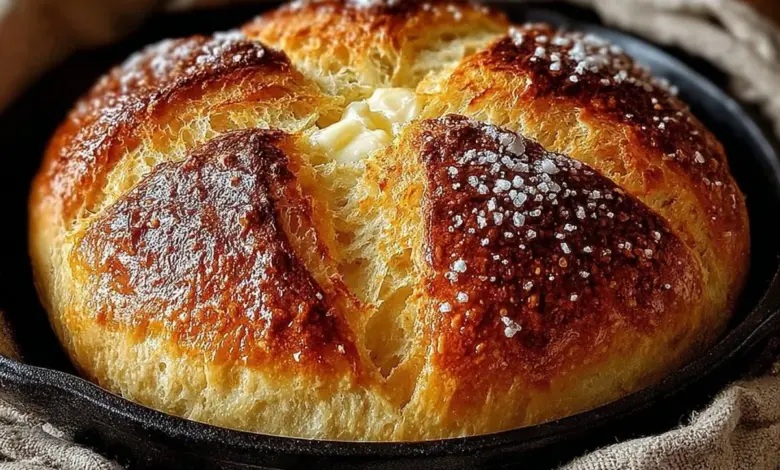
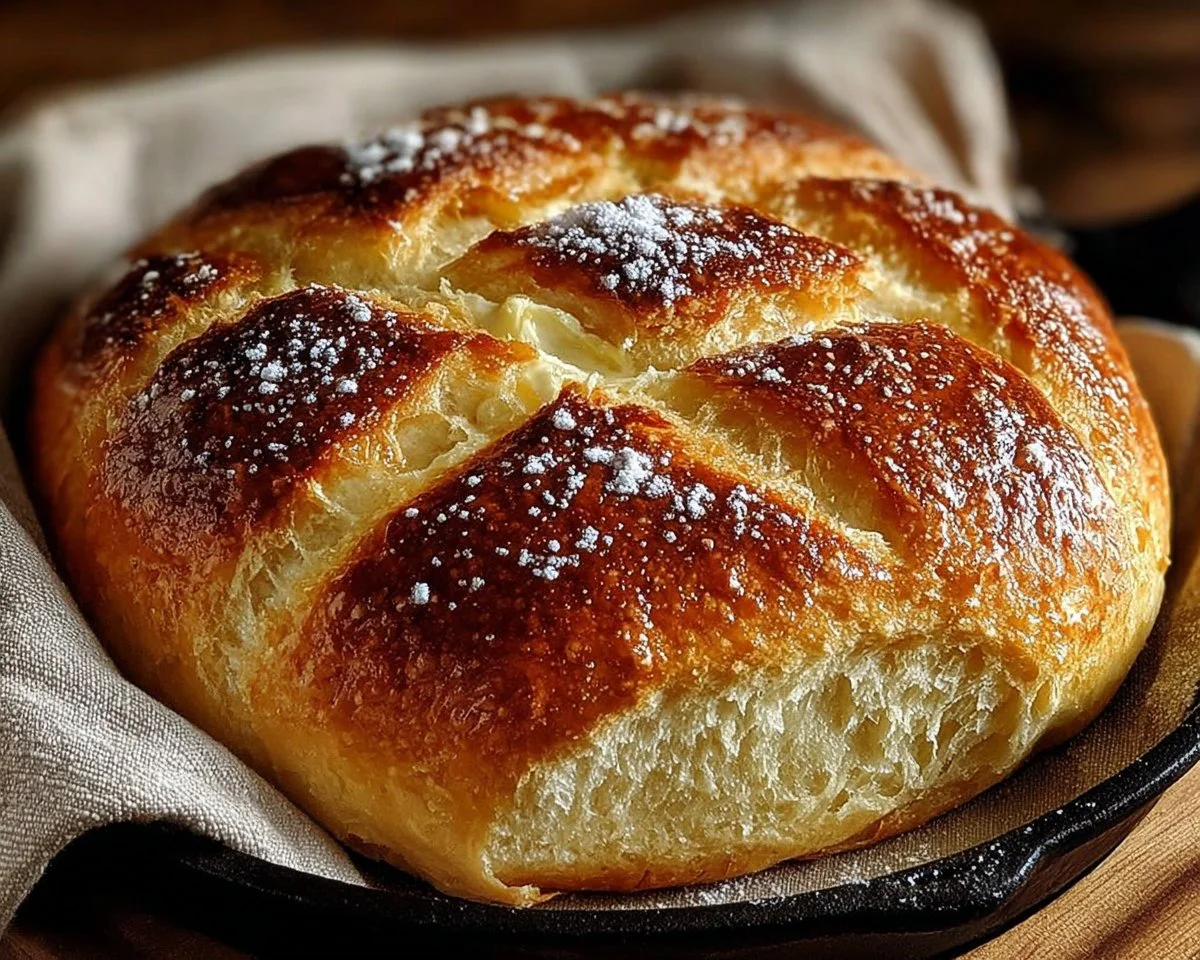
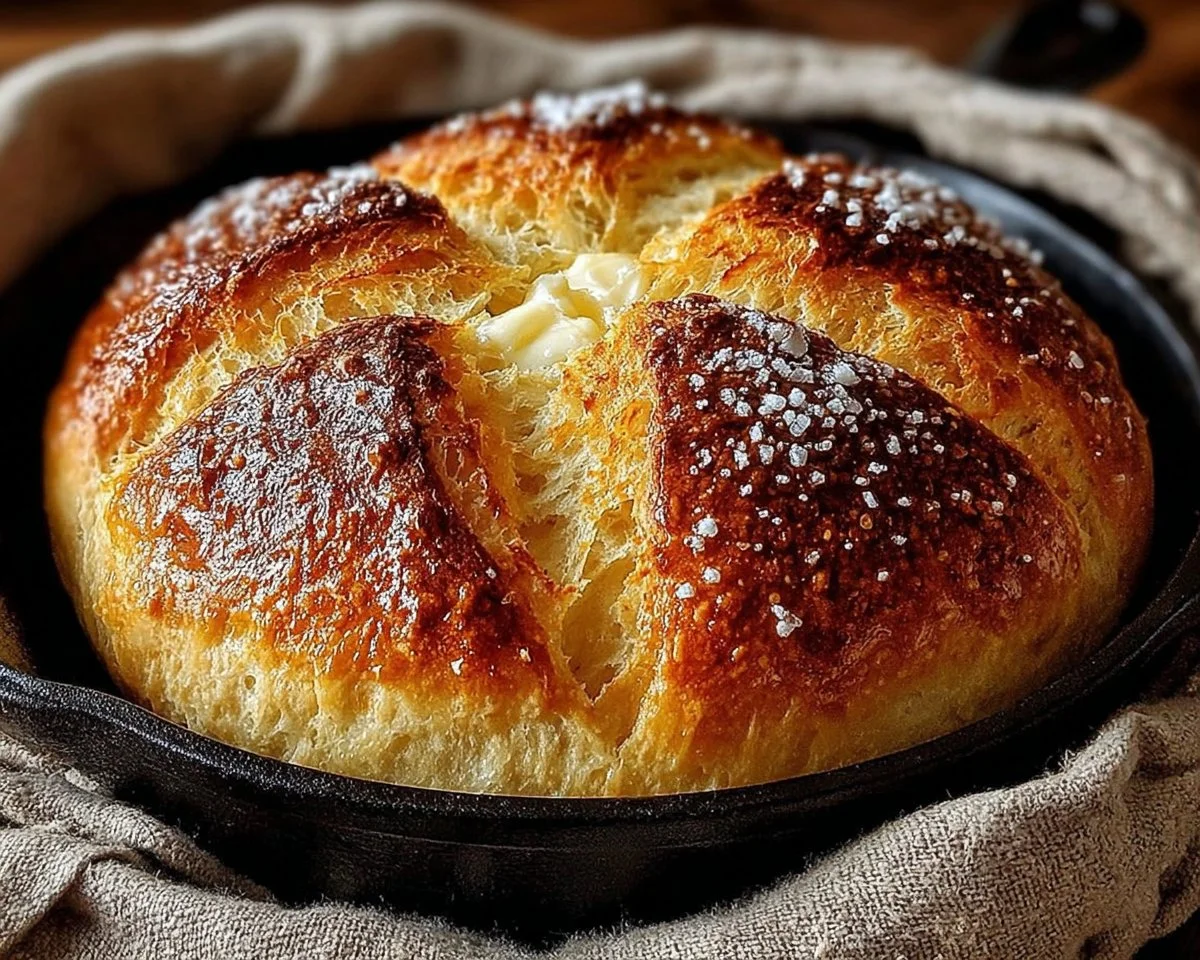
Creamy on the inside, golden and slightly crisp on the outside — No-Oven Stovetop Bread is the kind of comforting, everyday bread that feels like a hug from the skillet. This no-fuss loaf comes together with pantry staples, rises on the counter, and bakes in a skillet so you never need to heat a full oven. Fun fact: stovetop breads have been around for centuries in kitchens without ovens, from flatbreads to griddle loaves — so you’re cooking with tradition and convenience.
This recipe is special because it’s simple, quick to prep, and family-friendly. If you love the cozy aroma of homemade bread but don’t want to wait for an hour in a hot kitchen, this loaf delivers. If you enjoy warm-slice recipes, you might also like our apple cinnamon bread for a sweeter twist — both are crowd-pleasers. Ready your skillet and your favorite spread; this bread is waiting.
What is No-Oven Stovetop Bread?
What’s in a name? No-Oven Stovetop Bread is exactly what it sounds like — a loaf made and cooked entirely on the stovetop. Curious how a loaf can rise and brown without an oven? Think of it as a rebellious cousin of traditional baked bread, cozying up to a hot pan instead of an oven rack. Legend (or my kitchen experiments) says it earned its name after someone declared they’d rather “pan-bake” than preheat forever. After all, “the way to a man’s heart is through his stomach.” Give it a try and see if it wins yours too — you might never look back.
Why You’ll Love This:
- Main highlight: A tender, slightly chewy interior with a beautifully browned crust from the skillet — all without an oven. The texture is satisfying and adaptable to spreads, sandwiches, or soups.
- Cost-saving benefits: You’ll use inexpensive pantry staples and save on energy by not heating a full oven. Making this at home avoids store-bought markup and additives.
- Flavorful ingredients and toppings: The subtle tang of a well-fermented dough and the richness from melted butter in the mix make every bite flavorful. Top with herb butter, garlic oil, or honey for variety.
Compared to richer, sweeter loaves like our apple cinnamon bread, this stovetop bread is more savory and versatile — perfect for sandwiches, toasts, or dunking into stews. Grab your skillet and get ready to impress.
How to Make:
Quick Overview
This recipe is easy because it uses simple mixing and a short knead, then relies on a single rise and a final skillet bake. The result: a loaf with a soft crumb and a crisp exterior. Standout elements include the buttery richness in the dough and the golden skillet finish. Prep time is minimal — about 15-20 minutes active — with rising times totaling around 1.5 to 2 hours. Cook time on the skillet is roughly 10-14 minutes.
Ingredients
1 cup all-purpose flour
1 teaspoon baking powder
1/4 teaspoon salt
1/4 cup unsalted butter, melted
1/2 cup milk, room temperature
1 egg, beaten
1/4 cup warm water (about 105-110°F), for activating yeast
1 teaspoon sugar (amount based on preference)
1 teaspoon active dry yeast
1 tablespoon olive oil (for frying)
Directions
- Activate the yeast: In a small bowl, combine warm water, sugar, and yeast. Stir gently and let sit for 5-10 minutes until foamy. If it doesn’t foam, your yeast may be old — start again with fresh yeast and slightly warmer water.
- Mix dry ingredients: In a large bowl, whisk together flour, baking powder, and salt so everything is evenly distributed.
- Combine wet and dry: Make a well in the center of the flour mixture. Add the foamy yeast mixture, melted butter, milk, and beaten egg into the well.
- Form the dough: Use a spatula or your hand to mix until a soft dough forms. It will be slightly sticky but should hold together.
- Knead: Turn the dough onto a lightly floured surface and knead for 8-10 minutes until smooth and elastic. If the dough is too sticky, sprinkle a teaspoon of flour at a time — avoid adding too much.
- First rise: Place the dough in a lightly oiled bowl, turning once to coat. Cover with a clean towel or plastic wrap and let it rise in a warm spot for 1 to 1.5 hours until doubled in size.
- Shape: Punch down the dough gently to release air, then shape it into a round or oval loaf that will fit comfortably in your skillet.
- Second rise: Place the shaped dough on a piece of parchment or a lightly floured plate. Cover and let it rise for another 30 minutes until puffy.
- Heat the skillet: Heat a non-stick skillet over medium-low heat and add 1 tablespoon of olive oil, swirling to coat the bottom.
- Cook: Place the dough in the skillet. Cover the skillet with a tight-fitting lid and cook for 5-7 minutes per side until both sides are golden brown and the loaf sounds hollow when tapped. Adjust heat as needed to avoid burning.
- Cool: Remove the bread and let it cool slightly on a rack for 10-15 minutes before slicing. This helps finish the crumb set.
What to Serve With:
- Savory spreads: Herb butter, garlic butter, or olive oil with balsamic dip.
- Soups and stews: Thick tomato soup, creamy chowder, or lentil stew for dunking.
- Sandwich fillings: Roast chicken, grilled vegetables, or simple ham and cheese.
- Salads and sides: A crisp green salad, roasted veggies, or a tangy slaw to balance the bread’s richness.
- Drinks: Hot tea, coffee, or a chilled glass of milk for a comforting pairing.
Top Tips for Perfecting:
- Yeast check: Always proof yeast in warm (not hot) water with sugar. It should foam in 5-10 minutes.
- Kneading: Don’t rush kneading — 8-10 minutes develops gluten for structure and chew. If you’re short on time, use a stand mixer with a dough hook for 5-6 minutes.
- Heat control: Cook over medium-low heat to ensure the inside cooks through without burning the outside. If the crust browns too fast, lower the heat and cook longer under the lid.
- Variations: Add 1-2 teaspoons dried herbs or 1/4 cup grated cheese to the dough for extra flavor. For a softer crust, brush the loaf with melted butter immediately after cooking.
- Common mistakes: Avoid adding too much flour during kneading; it makes the bread dense. Also don’t skip the second rise — it helps the loaf finish properly.
In case you enjoy pairing stovetop breads with classic Southern flavors, our cornbread dressing is a delicious companion for holiday-style meals.
Storing and Reheating Tips:
- Room temperature: Store the cooled loaf in a paper bag or wrapped in a clean kitchen towel for up to 2 days to maintain crust texture.
- Refrigeration: For longer keeping, wrap tightly in plastic wrap or store in an airtight container and refrigerate for up to 4 days. Bring to room temperature or reheat before serving.
- Freezing: Slice the loaf and freeze in a freezer bag for up to 3 months. Thaw slices in the fridge overnight or at room temperature for an hour.
- Reheating: To refresh the crust, reheat in a skillet over low heat for 2-3 minutes per side or warm slices briefly in a toaster oven. Microwaving works for convenience but will soften the crust.
FAQs
Can I use instant yeast instead of active dry yeast?
Yes. If using instant yeast, you can mix it directly with the dry ingredients and skip the initial proofing step. Reduce the warm water slightly and add the yeast directly to the flour, then proceed with the wet ingredients.
What if my dough doesn’t rise?
Check the yeast freshness and water temperature. Water should be warm to the touch (about 105-110°F). If the dough still doesn’t rise, try placing it in a warmer spot or let it rest longer — sometimes slower, cooler rises still work.
Can I make this bread gluten-free?
This recipe is written for all-purpose wheat flour. For gluten-free baking, use a cup-for-cup gluten-free flour blend with xanthan gum and follow the manufacturer’s instructions; texture and rising may differ.
How do I know when the bread is fully cooked inside?
The loaf should be golden on both sides and sound hollow when tapped. If unsure, use an instant-read thermometer — it should read about 190-200°F in the center for a fully baked loaf.
Can I add seeds or nuts to the dough?
Yes. Fold in up to 1/3 cup of seeds (sunflower, sesame) or chopped nuts during the final shaping. Be mindful that additions can change the texture slightly.
Conclusion
This No-Oven Stovetop Bread proves that homemade bread can be simple, fast, and delicious without an oven. It’s versatile for meals, budget-friendly, and forgiving for beginner bakers — a must-try if you want fresh bread without the fanfare. For the original inspiration and a reference recipe, check out Clara’s No-Oven Stovetop Bread recipe. Share a warm slice with family or friends and enjoy the cozy satisfaction of homemade bread.
No-Oven Stovetop Bread
Equipment
- Mixing Bowl
- Non-stick Skillet
- Spatula
- Towel or Plastic Wrap
Ingredients
Dry Ingredients
- 1 cup all-purpose flour
- 1 teaspoon baking powder
- 1/4 teaspoon salt
Wet Ingredients
- 1/4 cup unsalted butter, melted
- 1/2 cup milk, room temperature
- 1 large egg, beaten
- 1/4 cup warm water (about 105-110°F) for activating yeast
- 1 teaspoon sugar amount based on preference
- 1 teaspoon active dry yeast
- 1 tablespoon olive oil for frying
Instructions
- 1. Activate the yeast: In a small bowl, combine warm water, sugar, and yeast. Stir gently and let sit for 5-10 minutes until foamy.
- 2. Mix dry ingredients: In a large bowl, whisk together flour, baking powder, and salt.
- 3. Combine wet and dry: Make a well in the center of the flour mixture. Add the foamy yeast mixture, melted butter, milk, and beaten egg into the well.
- 4. Form the dough: Use a spatula or your hand to mix until a soft dough forms.
- 5. Knead: Turn the dough onto a lightly floured surface and knead for 8-10 minutes until smooth and elastic.
- 6. First rise: Place the dough in a lightly oiled bowl, cover, and let it rise in a warm spot for 1 to 1.5 hours until doubled in size.
- 7. Shape: Punch down the dough gently, then shape it into a loaf.
- 8. Second rise: Place the shaped dough on a floured plate, cover, and let it rise for another 30 minutes.
- 9. Heat the skillet: Heat a non-stick skillet over medium-low heat and add olive oil.
- 10. Cook: Place the dough in the skillet, cover, and cook for 5-7 minutes per side until golden brown.
- 11. Cool: Remove the bread and let it cool slightly on a rack for 10-15 minutes before slicing.